Convert a model with AI Toolkit for VS Code (Preview)
Model conversion is an integrated development environment designed to help developers and AI engineers to convert, quantize, optimize and evaluate the pre-built machine learning models on your local Windows platform. It offers a streamlined, end-to-end experience for models converted from sources like Hugging Face, optimizing them and enabling inference on local devices powered by NPUs, GPUs, and CPUs.
Prerequisites
- VS Code must be installed. Follow these steps to set up VS Code.
- AI Toolkit extension must be installed. For more information, see install AI Toolkit.
Create project
Creating a project in model conversion is the first step toward converting, optimizing, quantizing and evaluating machine learning models.
-
Open the AI Toolkit view, and select Models > Conversion to launch model conversion
-
Start a new project by selecting New Model Project

-
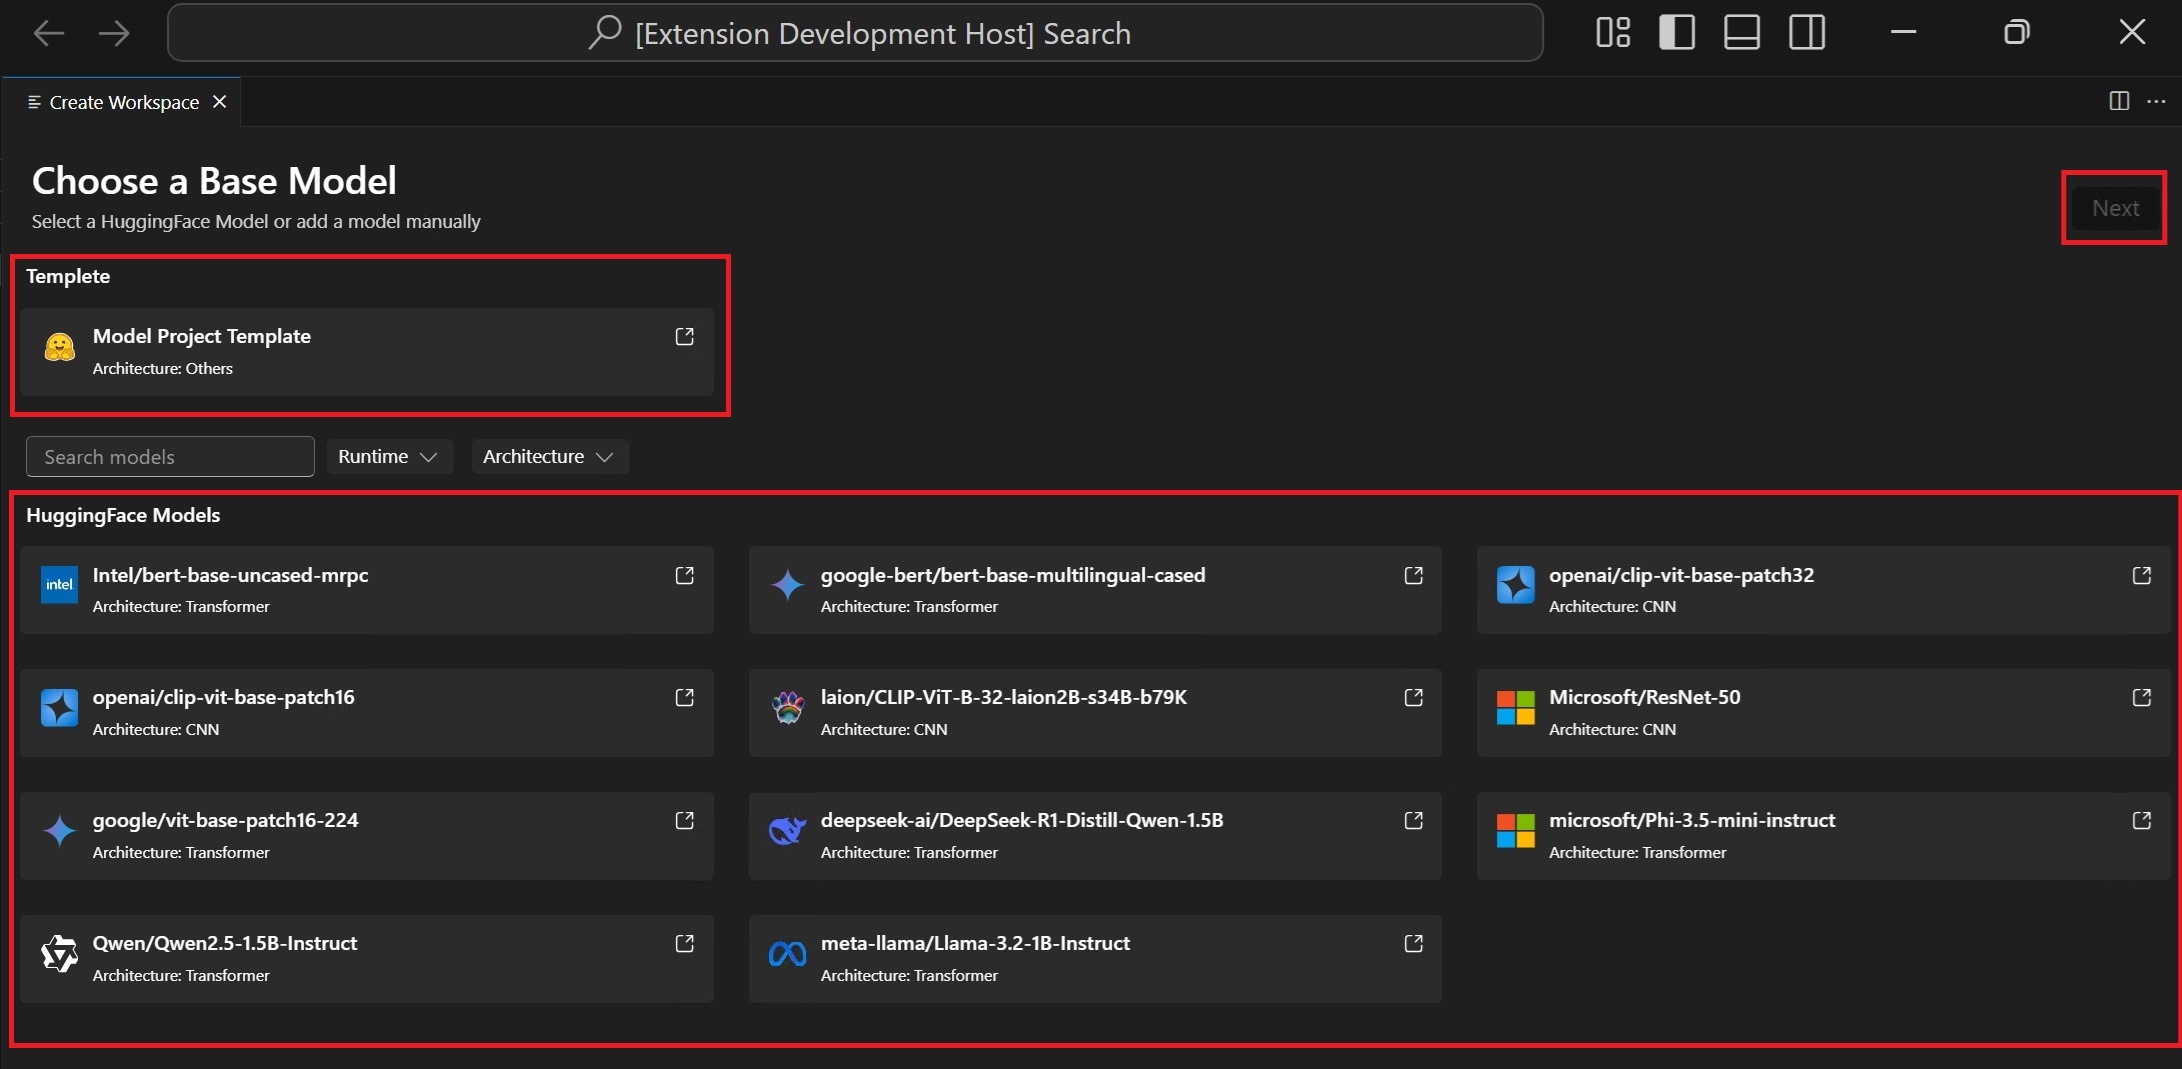
Choose a base model
Hugging Face Model: choose the base model with predefined recipes from the supported model list.Model Template: if the model is not included in the base model, select an empty template for your customized recipes (advanced scenario).
-
Enter project details: a unique Project Folder and a Project Name.
A new folder with the specified project name is created in the location you selected for storing the project files.
The first time you create a model project, it might take a while to set up the environment.
A README.md file is included in each project. If you close it, you can reopen it via the workspace.
Supported models
Model Conversion currently supports a growing list of models, including top Hugging Face models in PyTorch format.
LLM models
| Model Name | Hugging Face Path |
|---|---|
| Qwen2.5 1.5B Instruct | Qwen/Qwen2.5-1.5B-Instruct |
| DeepSeek R1 Distill Qwen 1.5B | deepseek-ai/DeepSeek-R1-Distill-Qwen-1.5B |
| Meta LLaMA 3.2 1B Instruct | meta-llama/Llama-3.2-1B-Instruct |
| Phi-3.5 Mini Instruct | Phi-3.5-mini-instruct |
Non-LLM models
| Model Name | Hugging Face Path |
|---|---|
| Intel BERT Base Uncased (MRPC) | Intel/bert-base-uncased-mrpc |
| BERT Multilingual Cased | google-bert/bert-base-multilingual-cased |
| ViT Base Patch16-224 | google/vit-base-patch16-224 |
| ResNet-50 | resnet-50 |
| CLIP ViT-B-32 (LAION) | laion/CLIP-ViT-B-32-laion2B-s34B-b79K |
| CLIP ViT Base Patch16 | clip-vit-base-patch16 |
| CLIP ViT Base Patch32 | clip-vit-base-patch32 |
(Optional) Add model into existing project
-
Open the model project
-
Select Models > Conversion, and then select Add Models on the right panel.

-
Choose a base model or template, and then select Add.
A folder containing the new model files is created in the current project folder.
(Optional) Create a new model project
-
Open the model project
-
Select Models > Conversion, and then select New Project on the right panel.
-
Alternatively, close the current model project and create a new project from the start.
Run workflow
Running a workflow in model conversion is the core step that transform the pre-built ML model into an optimized and quantized ONNX model.
-
Select File > Open Folder in VS Code to open the model project folder.
-
Review the workflow configuration
- Select Models > Conversion
- Select the workflow template to view the conversion recipe.
Conversion
The workflow will always execute the conversion step, which transforms the model into ONNX format. This step cannot be disabled.
Quantization
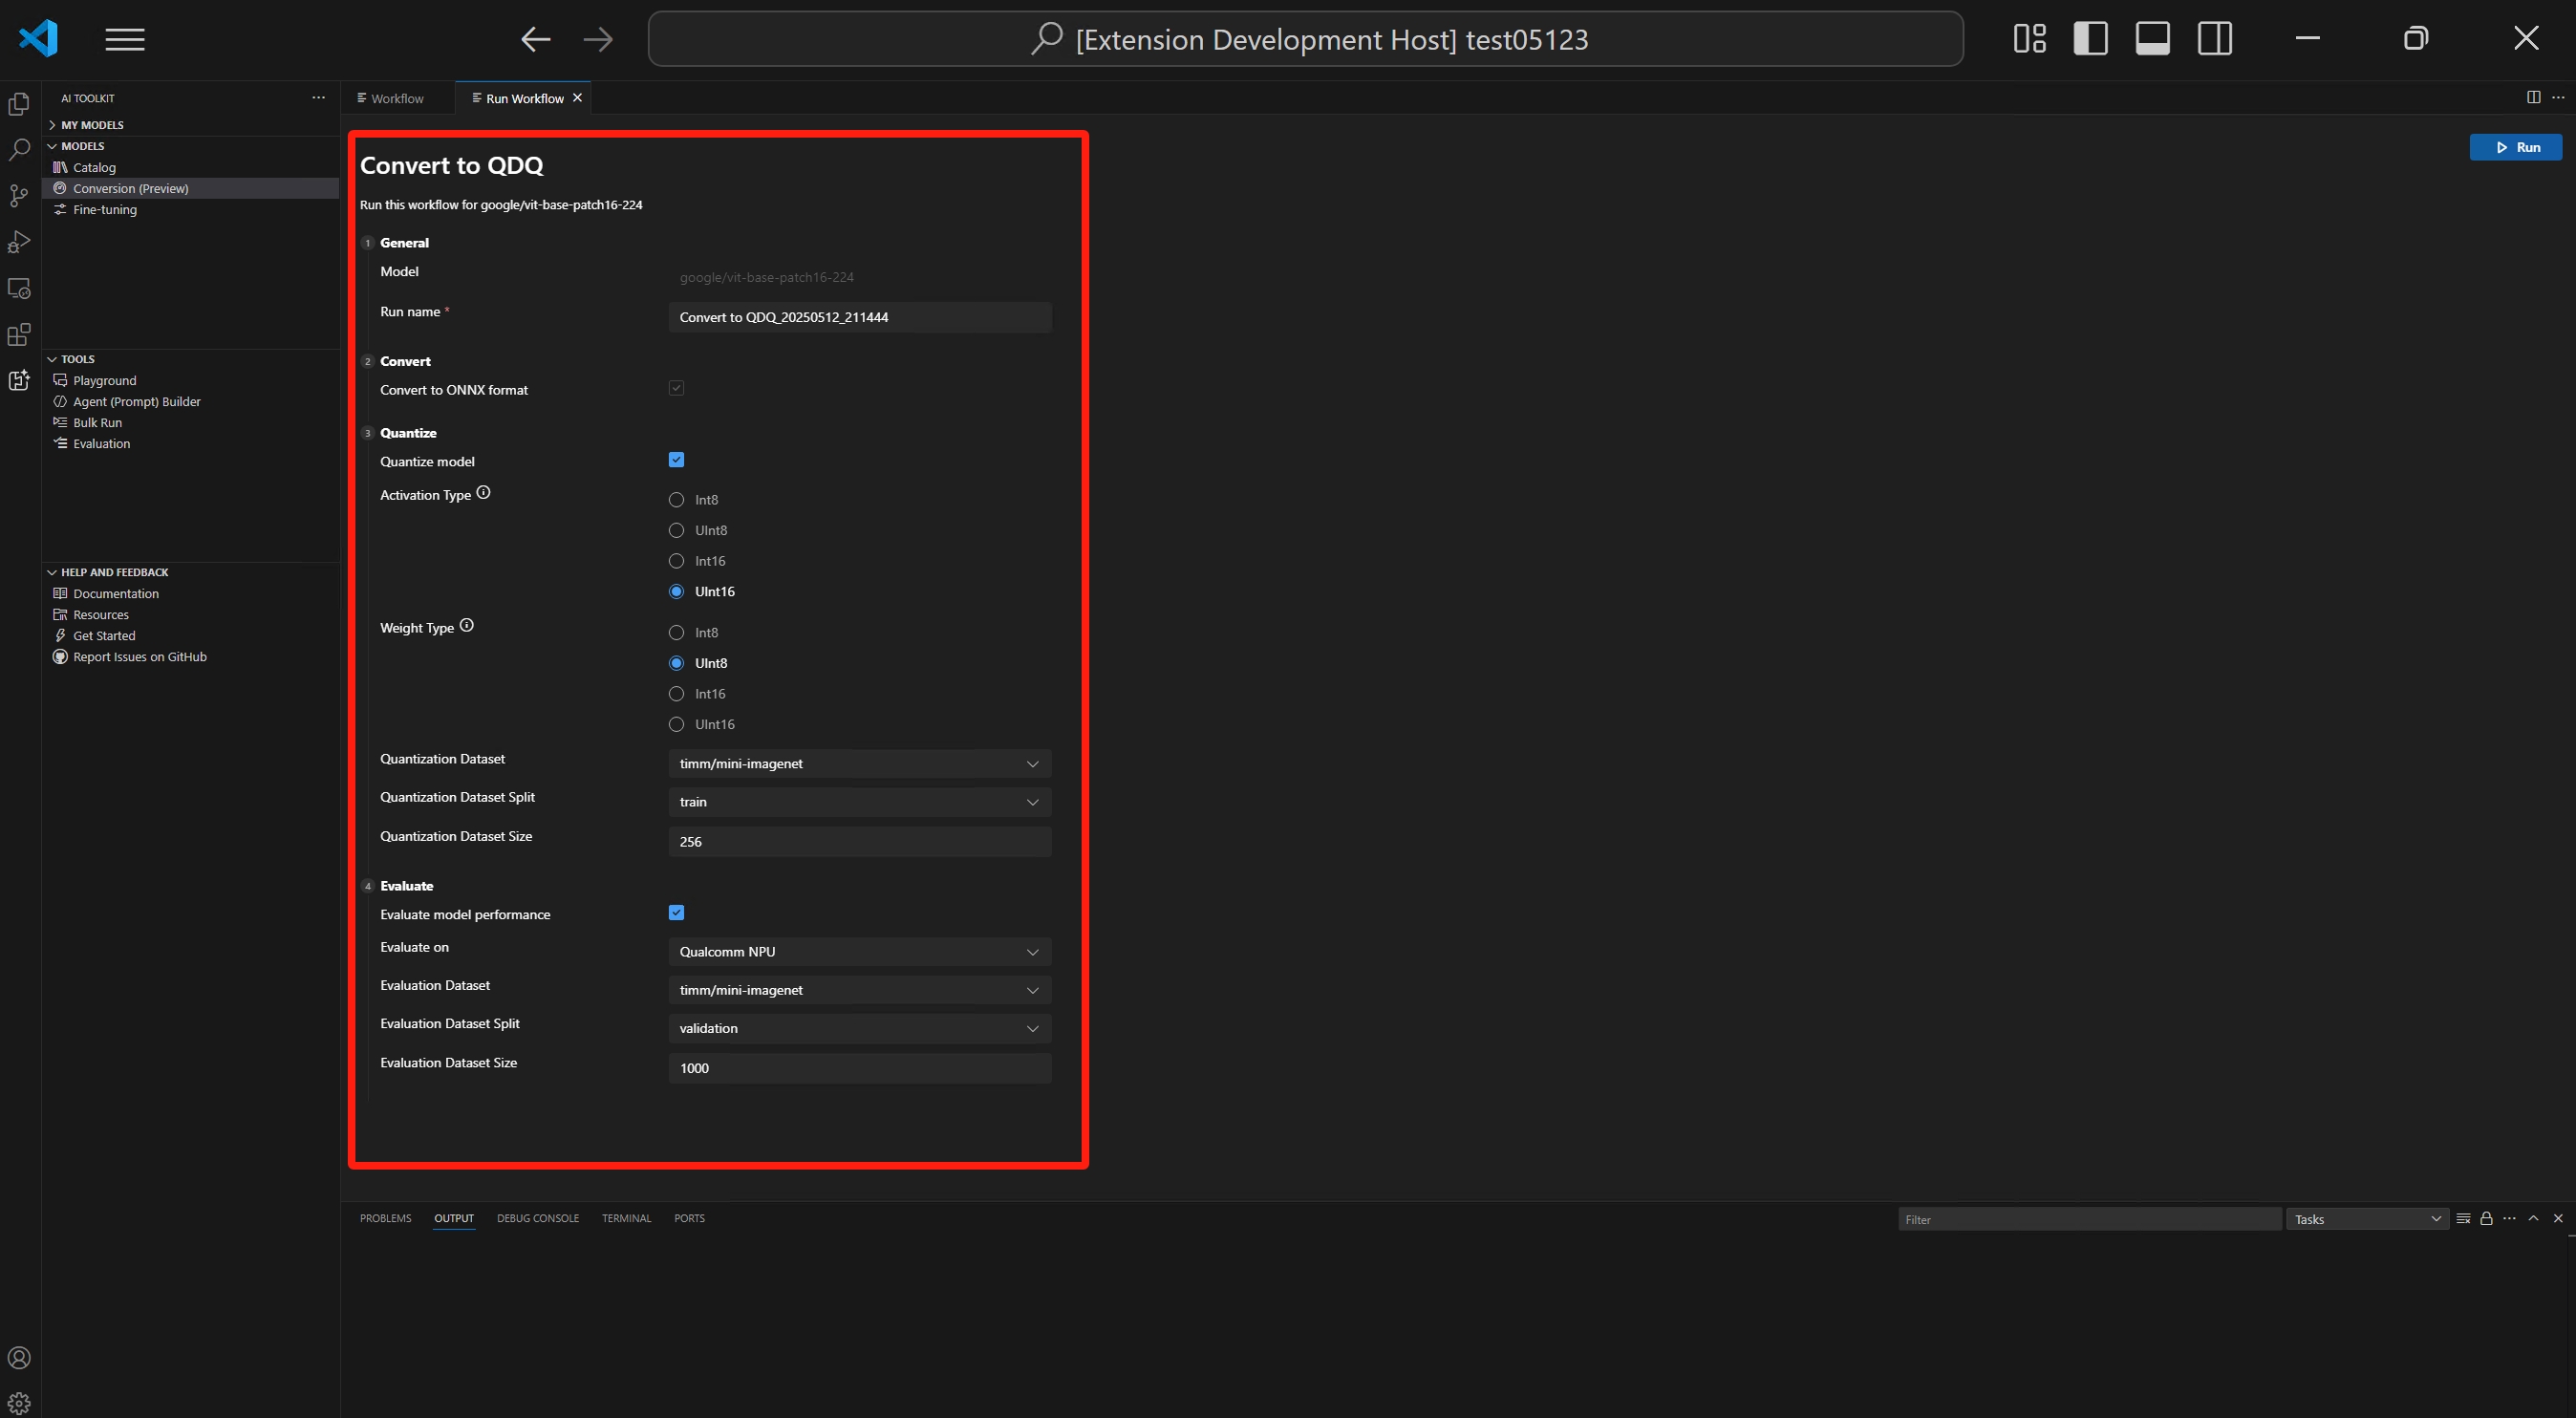
This section enables you to configure the parameters for quantization.
ImportantHugging Face compliance alerts: During the quantization, we need the calibration datasets. You may be prompted to accept license terms before proceeding. If you missed the notification, the running process will be paused, waiting for your input. Please make sure notifications are enabled and that you accept the required licenses.
-
Activation Type: this is the data type used to represent the intermediate outputs (activations) of each layer in the neural network.
-
Weight Type: this is the data type used to represent the learned parameters (weights) of the model.
-
Quantization Dataset: calibration dataset used for quantization.
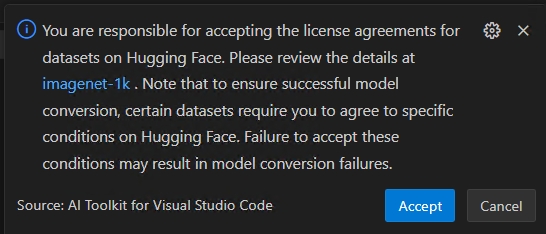
If your workflow uses a dataset that requires license agreement approval on Hugging Face (e.g., ImageNet-1k), you’ll be prompted to accept the terms on the dataset page before proceeding. This is required for legal compliance.
-
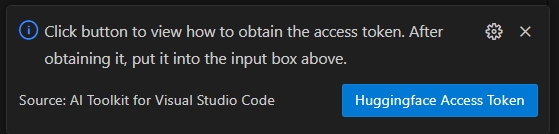
Select the HuggingFace Access Token button to get your Hugging Face Access Token.
-
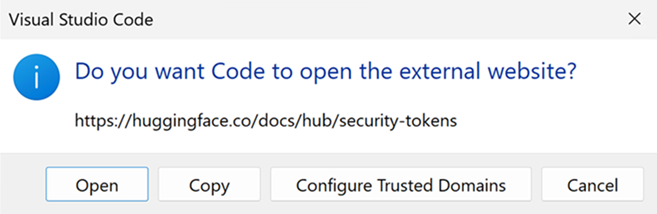
Select Open to open the Hugging Face website.
-
Get your token on Hugging Face portal and paste it Quick Pick. Press Enter.

-
-
Quantization Dataset Split: dataset could have different splits like validation, train and test.
-
Quantization Dataset Size: the number of data used to quantize the model.
For more information about activation and weight type, please see Data type selection.
You could also disable this section. In this case, the workflow will only convert the model to ONNX format but do not quantize the model.
Evaluation
In this section, you need to select the Execution Provider (EP) you want to use for evaluation, regardless of the platform on which the model was converted.
- Evaluate on: the target device that you want to evaluate the model. Possible values are:
- Qualcomm NPU: to use this, you need a compatible Qualcomm device.
- AMD NPU: to use this, you need a device with a supported AMD NPU.
- Intel NPU: to use this, you need a device with a supported Intel NPU.
- CPU: any CPU could work.
- Evaluation Dataset: dataset used for evaluation.
- Evaluation Dataset Split: dataset could have different splits like validation, train and test.
- Evaluation Dataset Size: the number of data used to evaluate the model.
You could also disable this section. In this case, the workflow will only convert the model to ONNX format but do not evaluate the model.
-
Run the workflow by selecting Run
A default job name is generated using the workflow name and timestamp (e.g.,
bert_qdq_2025-05-06_20-45-00) for easy tracking.During the job running, you can Cancel the job by selecting the status indicator or the three-dot menu under Action in History board and select Stop Running.
Hugging Face compliance alerts: During the quantization, we need the calibration datasets. You may be prompted to accept license terms before proceeding. If you missed the notification, the running process will be paused, waiting for your input. Please make sure notifications are enabled and that you accept the required licenses.
Model conversion and quantization: you can run workflow on any device expect for LLM models. The Quantization configuration is optimized for NPU only. It's recommended to uncheck this step if the target system is not NPU.
LLM model quantization: If you want to quantize the LLM models, a Nvidia GPU is required.
If you want to quantize the model on another device with GPU, you can setup environment by yourselves, please refer ManualConversionOnGPU. Please note that only "Quantization" step need the GPU. After quantization, you can evaluate the model on NPU or CPU.
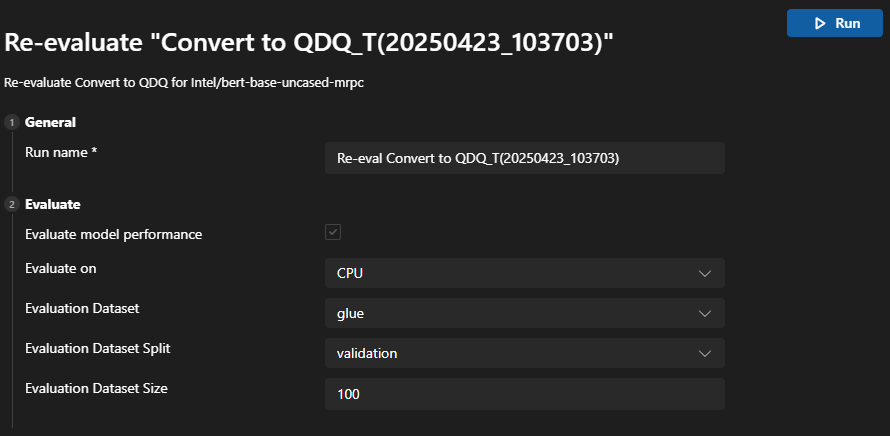
Tips for re-evaluation
After a model has been successfully converted, you could use the re-evaluate function to perform evaluation again without the model conversion.
Go to the History board and find the model run job. Select the three-dot menu under Action to Re-evaluate the model.
You can choose the different EPs or datasets for re-evaluation
Tips for failed jobs
If your job is canceled or failed, you can select job name to adjust the workflow and run job again. To avoid accidental overwrites, each execution creates a new history folder with its own configuration and results.
View results
The History Board in Conversion is your central dashboard for tracking, reviewing, and managing all workflow runs. Each time you run a model conversion and evaluation, a new entry is created in the History Board—ensuring full traceability and reproducibility.
- Find the workflow run that you want to review. Each run is listed with a status indicator (e.g. Succeeded, Cancelled)
- Select the run name to view the conversion configurations
- Select the logs under Status indicator to view logs and detailed execution results
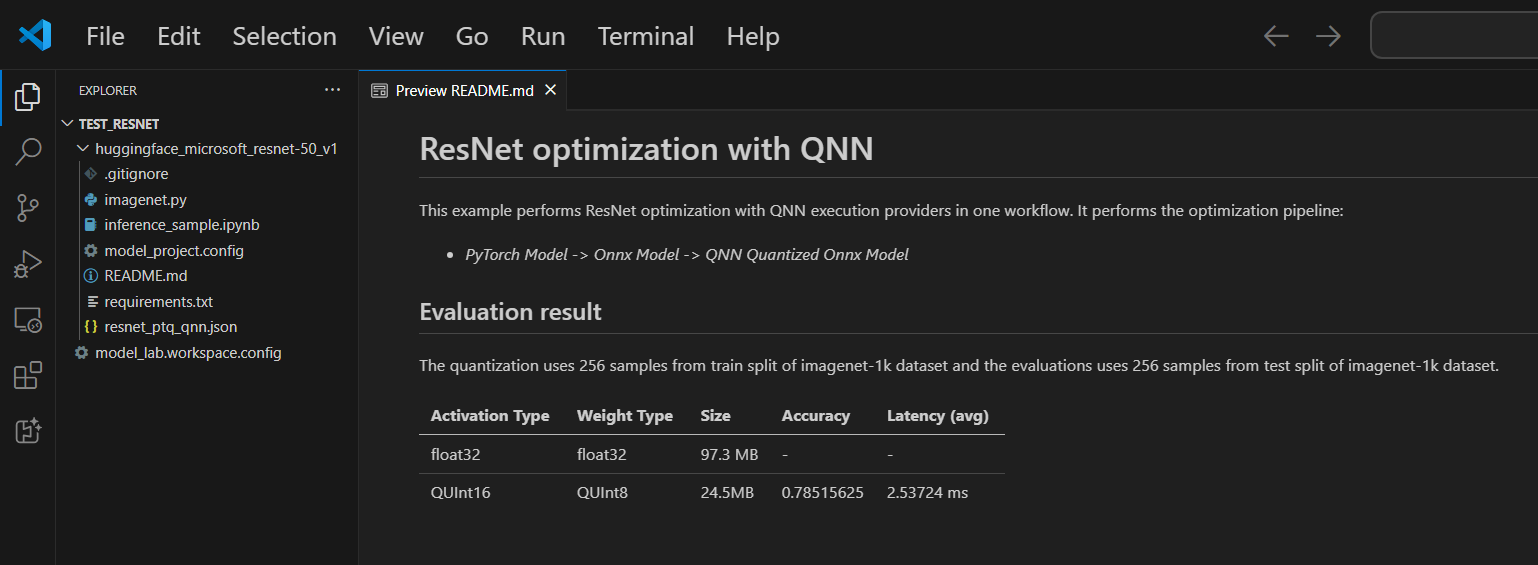
- Once the model converted successfully, you can view the evaluation results under Metrics. Metrics such as accuracy, latency and throughput are displayed alongside each run

Use sample notebook for model inference
-
Go to the History board. Select the three-dot menu under Action.
Select Inference in Samples from the dropdown.

-
Choose the Python environment
- You'll be prompted to select a Python virtual environment.
The default runtime is:
C:\Users\{user_name}\.aitk\bin\model_lab_runtime\Python-WCR-win32-x64-3.12.9. - Note that the default runtime contains everything needed, otherwise, manually install the requirements.txt
- You'll be prompted to select a Python virtual environment.
The default runtime is:
-
The sample will launch in a Jupyter Notebook. You can customize the input data or parameters to test different scenarios.
Model compatibility: Ensure the converted model supports the specified EPs in the inference samples
Sample location: Inference samples are stored alongside the run artifacts in the history folder.
Export and share with others
Go to the History board. Select Export to share the model project with others. This copies the model project without history folder. If you want to share models with others, select the corresponding jobs. This copies the selected history folder containing the model and its configuration.